Run your whole POS from one Android phone: the setup, step by step.
For events, food stalls, takeaway counters and small cafes: one Android phone takes the orders, prints KOTs and GST bills on a thermal printer, and keeps the cash box. Follow the nine steps below from signup to your first bill. Every screenshot is the Android app itself.
One phone, one printer, a little internet.
- An Android phone on Android 8 or newer. This phone becomes the counter. The iPhone app is not in the App Store yet, so this setup is Android only for now.
- One thermal printer. 58mm or 80mm, Bluetooth or Wi-Fi, speaking ESC/POS. A phone cannot drive a USB printer.
- Internet for the setup. For the signup and the first sign-in. After that, billing works without it.
- A charger or a power bank. The whole event runs on one phone, so plan its battery before you start.
Signup to the first bill: nine steps, every screen shown.
Create your restaurant on the dashboard
Restaurants are created at app.easykot.com, not inside the app. Press Create your store, fill in your name, restaurant name, email, mobile number and password, and press Create store. The form works in the phone's browser too. Add the menu next, from Get started: photos or PDFs of your menu, a spreadsheet, or the sample menu to practise with. Before the first real bill, put your GSTIN and business details in Settings, because the bill prints what Settings holds.
The menu in detail: menu setup and AI import.
Install EasyKOT on the phone
The phone needs Android 8 or newer. Download the Android app from easykot.com/download. If we invited your Gmail to the Google Play test, install EasyKOT Captain from that Play link instead: it is the same app. Stay with one source, because the website build and the Play build do not update each other. The screenshots here are from Captain 0.2.12. The website download is 0.2.13, with the same three cards on its first screen.
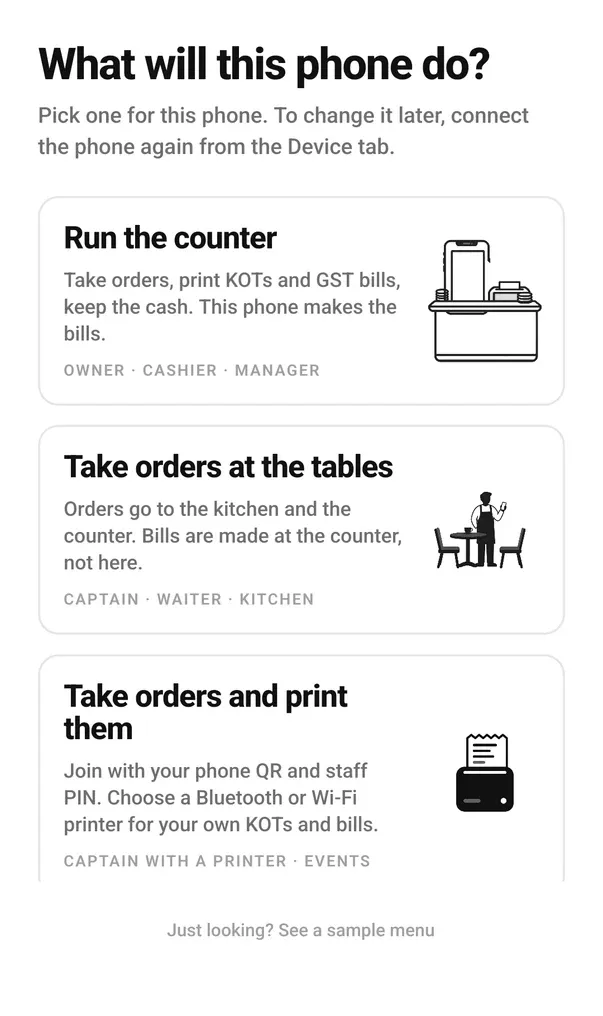
Tap Run the counter
The first screen asks “What will this phone do?”. Tap Run the counter. This is the phone that makes the bills, with its own GST invoice series. Take orders at the tables is for a waiter's phone, and Take orders and print them is for a captain who carries a small printer of their own; neither one runs the shop. Picked the wrong card? “Start over — reset this phone” on the Device tab brings this screen back.
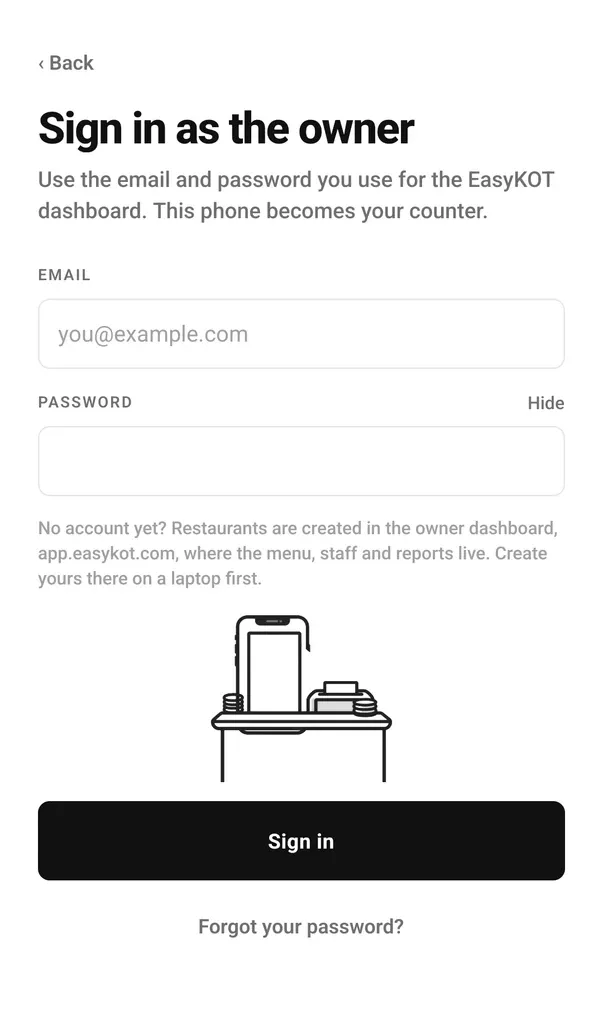
Sign in as the owner
Type the email and password you used on app.easykot.com and press Sign in. This needs internet once. The phone then shows Setting up this phone while it connects, downloads your menu and opens the counter. It happens once: after that the phone opens straight to the counter, online or not.
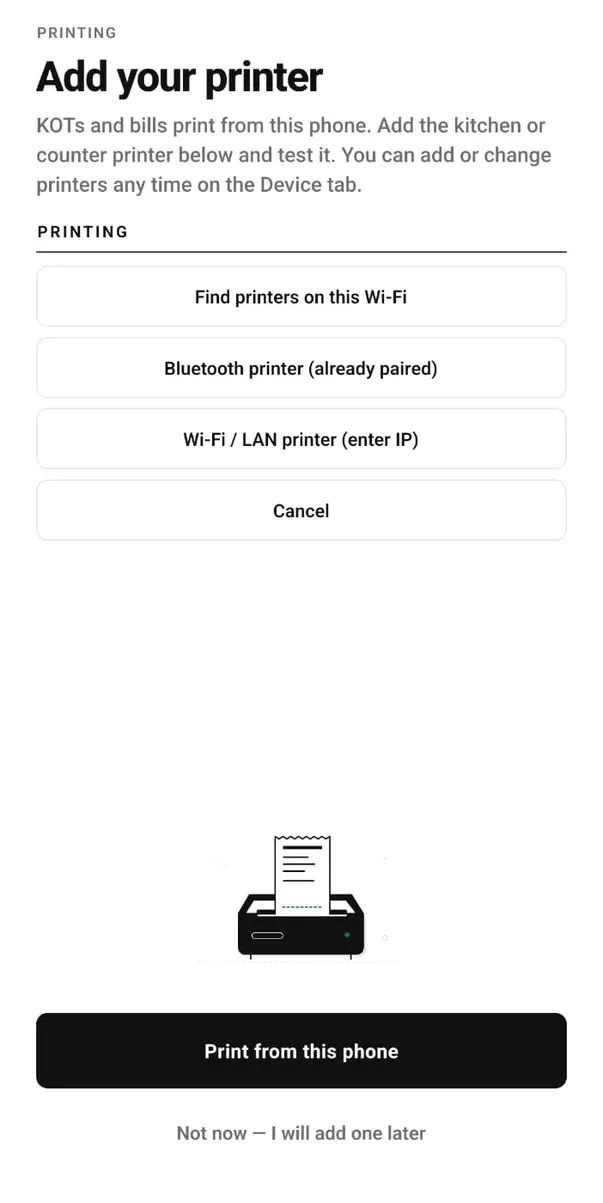
Add your printer and print a test slip
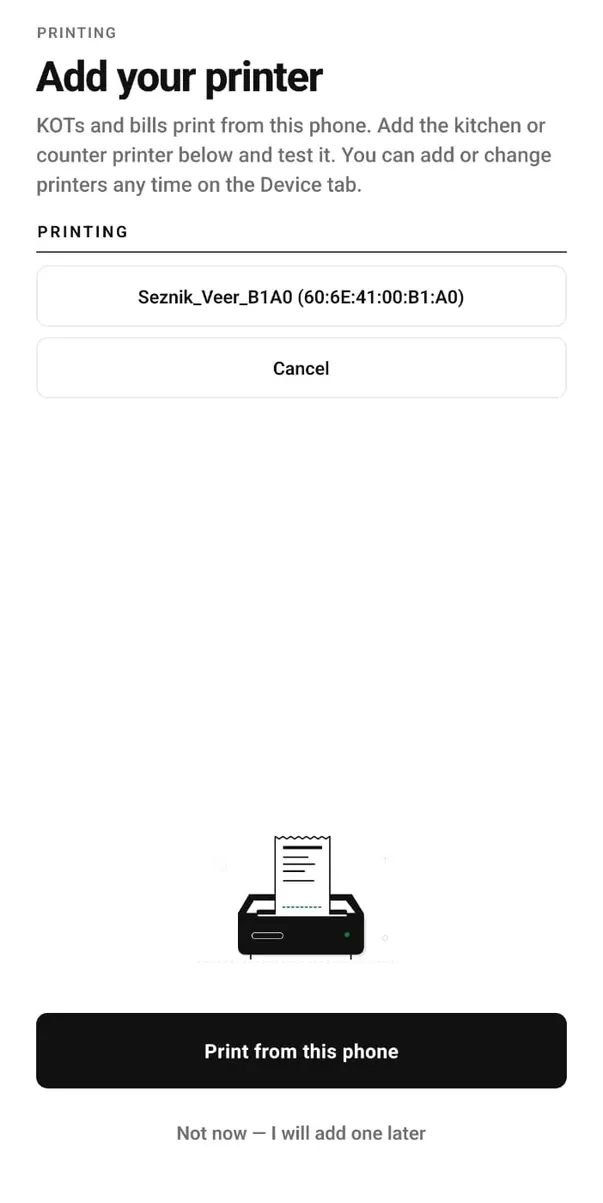
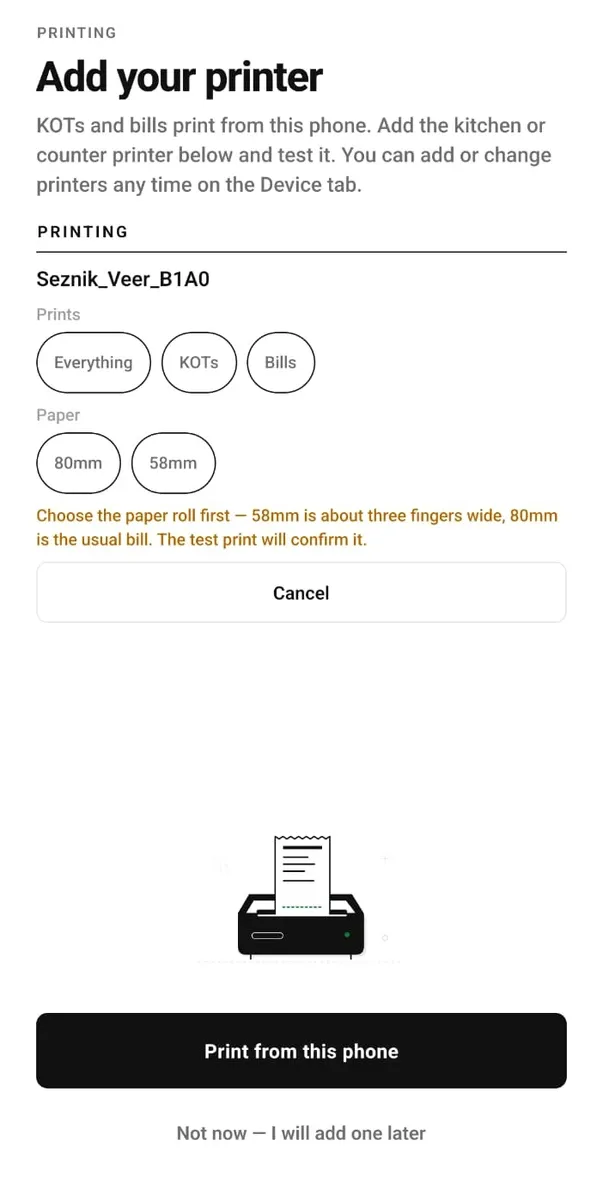
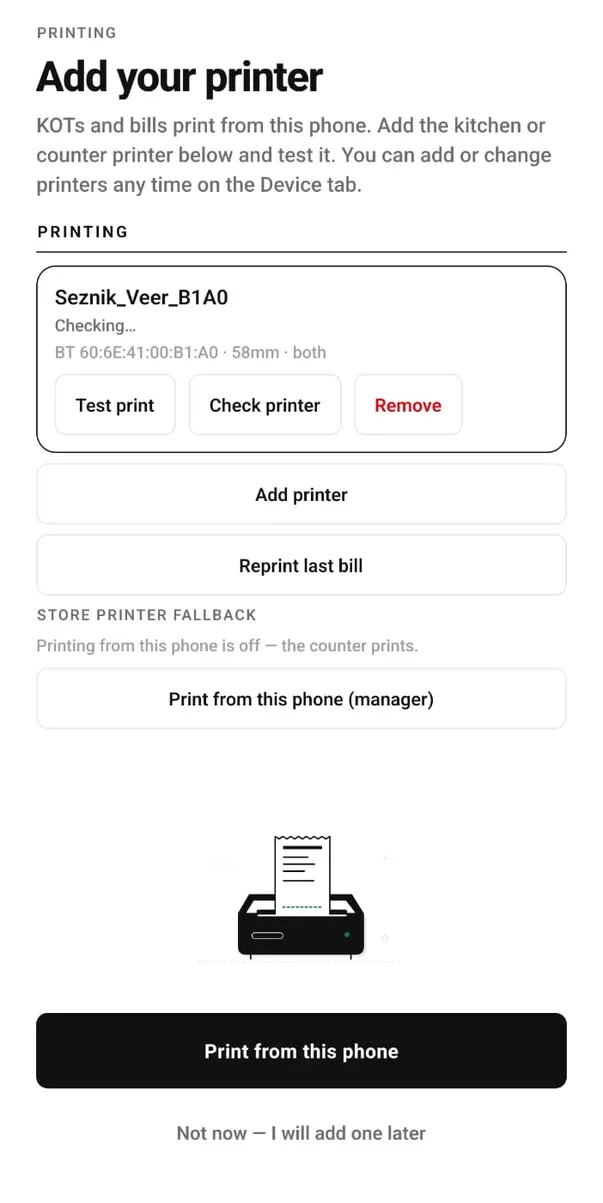
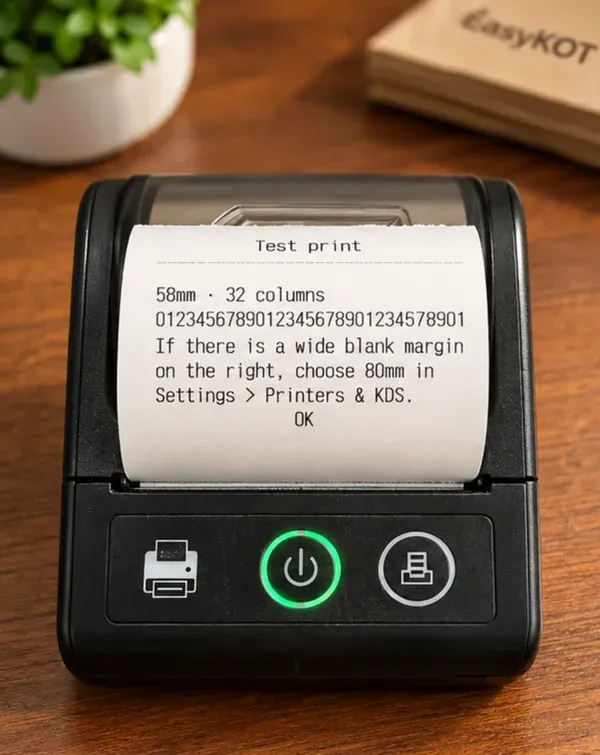
Next comes “Add your printer”. Tap Add printer and pick how it connects: a Bluetooth printer that is already paired, a Wi-Fi or LAN printer by its IP address, or a search of your Wi-Fi. Pair a Bluetooth printer once in Android's own Bluetooth settings first; EasyKOT asks for the Nearby devices permission to see it. A Wi-Fi printer takes its IP address and port 9100. Under Prints choose Everything, under Paper choose the width of your roll, 58mm or 80mm, and save the printer. Run the “Test print”: the phone says the slip was sent, and the printer gives you a test slip with a row of 32 digits on 58mm paper. If the row is cut off, change the width and test again. Then press “Print from this phone”.
Every Bluetooth screen, step by step: pair a Bluetooth printer with an Android phone.
Open the cash box
Open the Device tab. Under Cash box, type the cash you are putting in the box to start the day, in rupees, and press Start cash shift. The owner is not asked for a PIN here; a captain who opens the box is asked for a manager's.
Take the first order and send the KOT
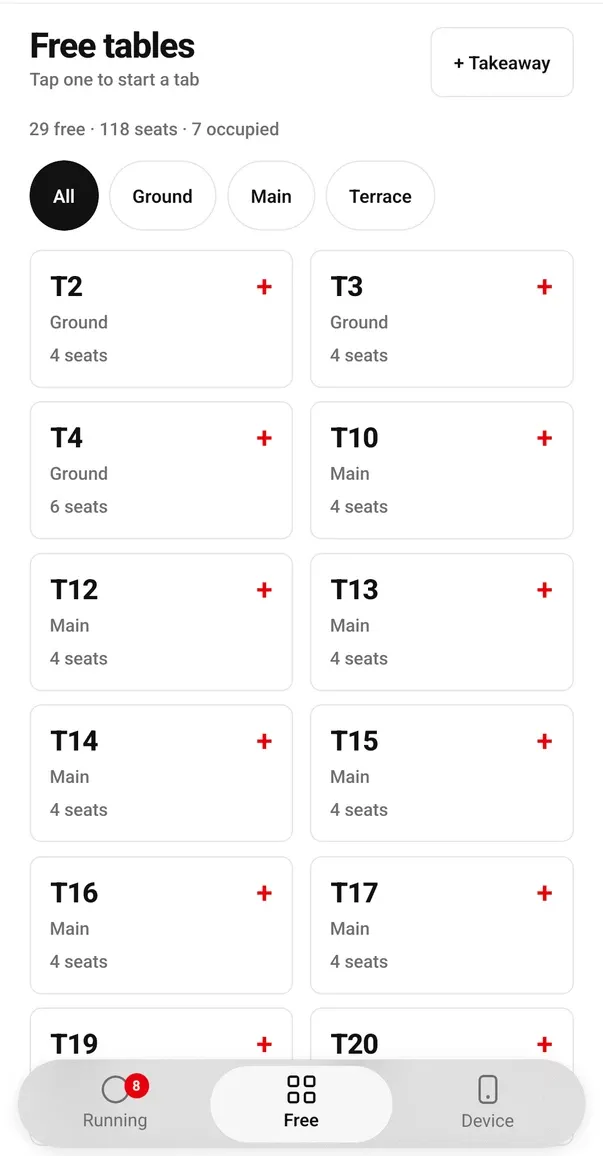
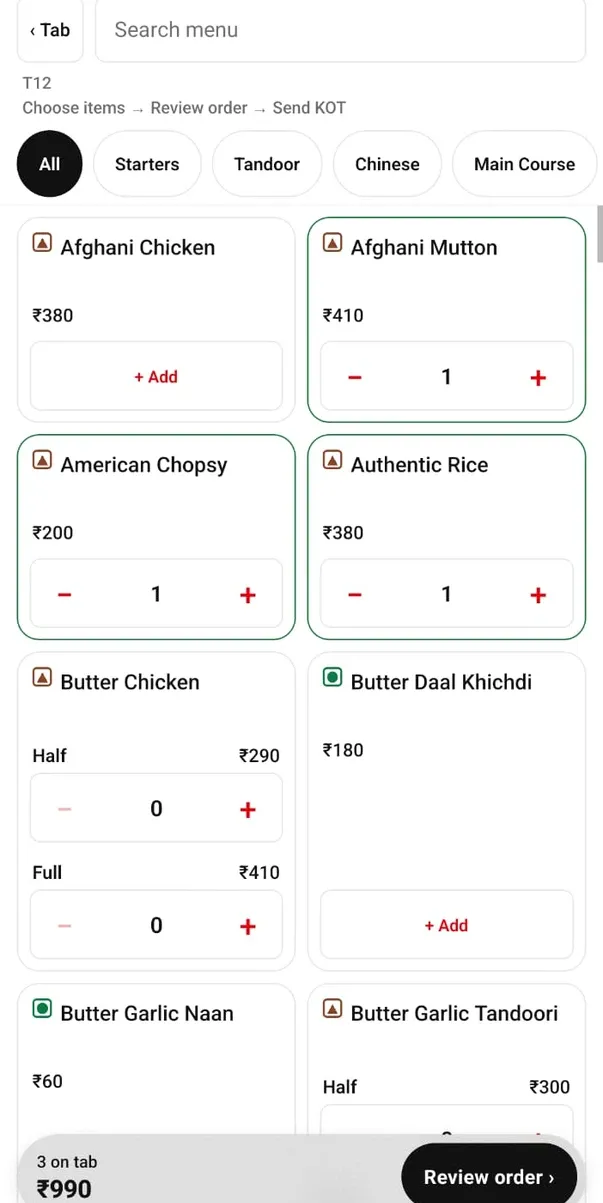
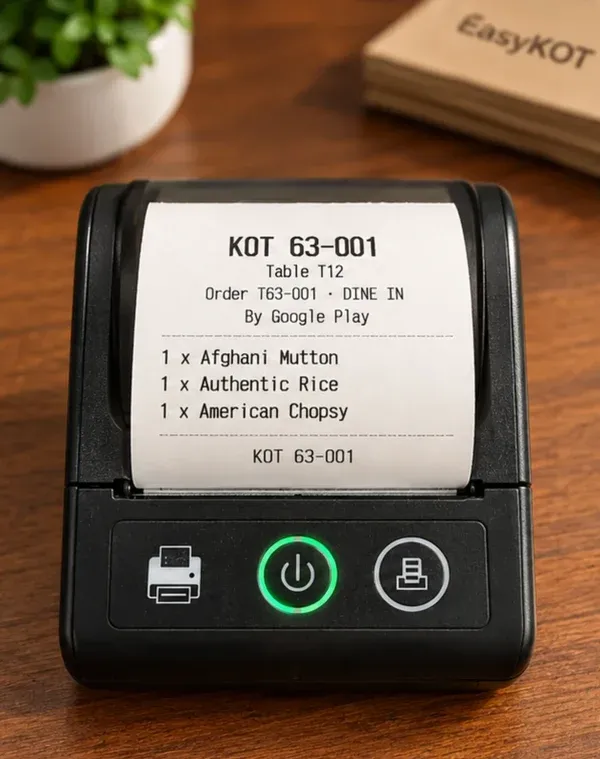
Go to the Free tab. Tap “+ Takeaway” for a parcel order; on a phone-only store the tab has no tables and says so, so every order starts there. If a Desktop App has drawn your tables, tap a table instead. Tap + Add on a dish, or the + beside Half or Full on a dish with portions, then press Review order, add a Note for the kitchen if it needs one, and press “Send KOT”. The KOT prints on this phone's printer straight away with its KOT number and the order number on top. The pictures below follow one real order, T63-001 for table T12 in our test store; a takeaway KOT says TAKEAWAY where this one names the table.
Print the bill, then mark cash or UPI
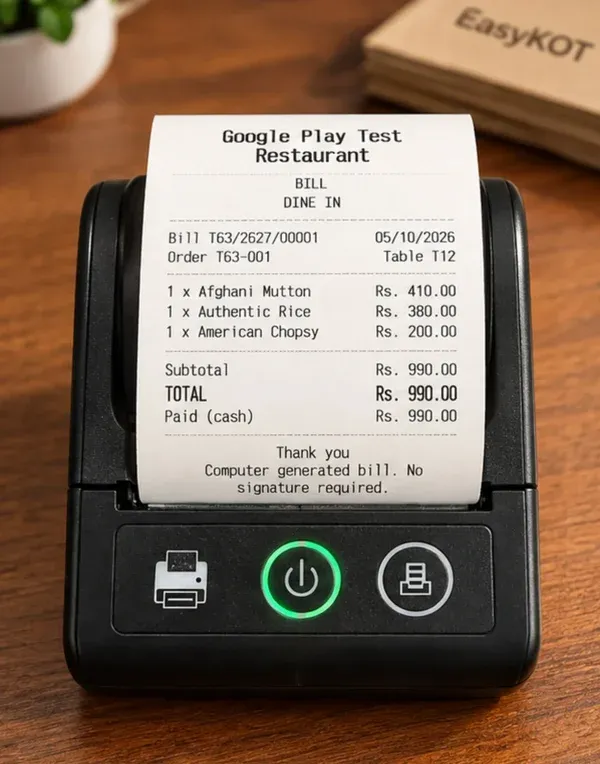
On the order, press Settle. The sheet shows the subtotal, a box for a discount, and the total. Press “Print bill”: the phone tells you which bill number it printed, and the bill comes out with the invoice number, the date, the order number and every dish. Then press Cash or UPI. That only records how the guest paid: no drawer opens and no card is read. Check a UPI payment in your UPI app before you mark it. The bill below is the same order T63-001 as the KOT above.
Count the box and close the shift
At the end of the event, open the Device tab again. Cash box shows the float, cash sales, UPI sales, cash in, paid out and “Should be in the box”. Press “Count & close shift”, type what is actually in the box, and the phone shows what was expected, what you counted and the variance.
Need tables? Draw them once in the Desktop App.
- The phone has no way to create a table, and neither does the dashboard. Tables are drawn only in the EasyKOT Desktop App on a Windows or Mac computer, under Settings → Tables & floors. That is why a phone-only store's Free tab is empty and offers + Takeaway.
- For an event, a stall or a parcel counter, that is the right setup: every order is a takeaway and the bill prints on the spot.
- If you want dine-in, install the Desktop App on any Windows or Mac computer once, draw the tables, and they reach the phone by themselves. The steps: set up tables and the floor plan.
Keep the phone going through the rush.
- Leave the notification alone. The EasyKOT is the printer notification means printing is running. Do not swipe it away. On the Device tab, Open battery settings lets EasyKOT skip battery optimisation, or the phone may doze with the screen off.
- No internet, sales go on. Orders, KOTs, bills and the cash box are saved on the phone itself, and reach the dashboard when the internet comes back.
- Look after the printer too. Charge it fully and carry a spare paper roll. If the paper runs out the sale is not lost: the ticket waits on the phone and prints again from the Device tab.
- A whole trading day on the phone, and where it stops: run a POS without a laptop.
Straight answers.
Do I need internet at the event?
Which printer should I buy?
Can I add tables from the phone?
Can a second phone take orders?
Can the phone take card payments?
Will the bill carry my GST details?
Set up? These come next.
Pair a Bluetooth printer
Pairing in Android's settings, the Nearby devices permission, paper width and the test slip, screen by screen.
The printer guide →Add a second phone
Connect a helper's phone with a Connect phone QR; its KOTs print on this counter phone.
Captain setup →Your first GST bill
The invoice number, the CGST and SGST lines, and what the DUPLICATE stamp on a reprint means.
The GST bill guide →Run it 3 months, then pay for it.
Three months free, full product, no card. Made in India, for the counter: built inside a running restaurant.