Ek Android phone pe poora POS: setup, step by step.
Event, food stall, takeaway counter ya chhota cafe? Ek Android phone order lega, thermal printer pe KOT aur GST bill nikalega, aur cash box ka hisaab rakhega. Signup se pehle bill tak, neeche ke 9 steps line se follow karo. Har screenshot Android app ka hi hai.
Ek phone, ek printer, thoda internet.
- Android phone, Android 8 ya naya. Yahi phone counter banega. iPhone wala app abhi App Store pe nahi hai, isliye yeh setup sirf Android pe chalta hai.
- Ek thermal printer. 58mm ya 80mm, Bluetooth ya Wi-Fi, ESC/POS wala. Phone se USB printer nahi chalta.
- Setup ke liye internet. Signup aur pehle sign-in ke liye. Uske baad billing bina internet ke bhi chalti hai.
- Charger ya power bank. Poora event ek hi phone pe chalega, toh battery ka plan pehle se rakho.
Signup se pehla bill: 9 steps, har screen ke saath.
Dashboard pe apna restaurant banao
Restaurant app.easykot.com pe banta hai, app ke andar nahi. Create your store dabao, apna naam, restaurant ka naam, email, mobile number aur password bharo, phir Create store. Yeh form phone ke browser mein bhi chalta hai. Uske baad Get started se menu daalo: menu ki photos ya PDF, spreadsheet, ya practice ke liye sample menu. Pehle real bill se pehle Settings mein GSTIN aur business details bhar do, kyunki bill pe wahi chhapta hai jo Settings mein hai.
Menu ki poori details: menu setup aur AI import.
Phone pe EasyKOT install karo
Phone mein Android 8 ya usse naya chahiye. Android app easykot.com/download se download karo. Agar humne aapki Gmail ko Google Play test mein invite kiya hai, toh usi Play link se EasyKOT Captain install karo: app wahi hai. Ek hi jagah se install rakho, kyunki website wala build aur Play wala build ek doosre ko update nahi karte. Is page ke screenshots Captain 0.2.12 ke hain. Website download 0.2.13 hai, aur uski pehli screen pe bhi wahi teen cards hain.
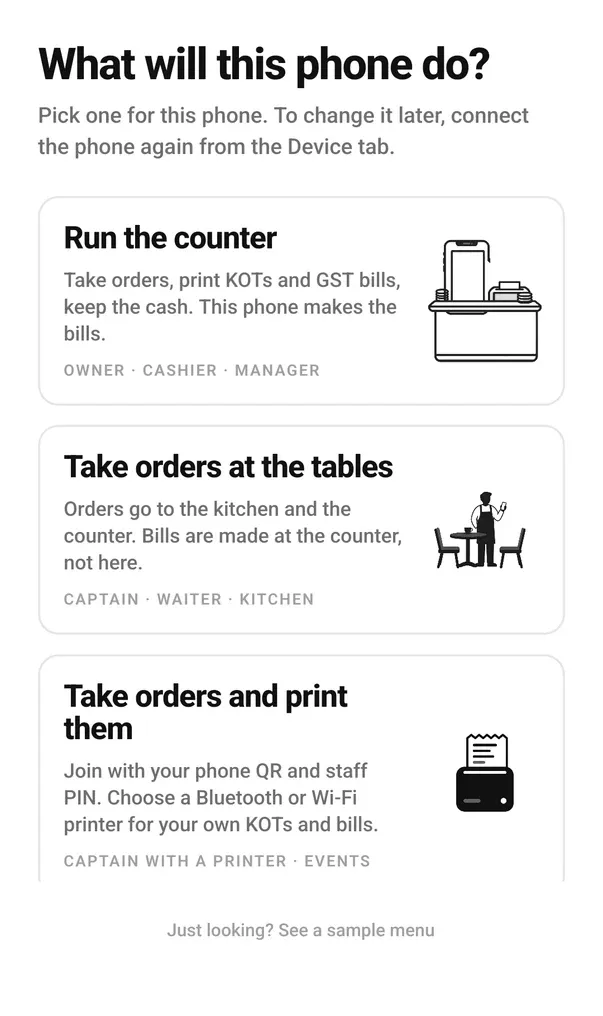
Run the counter pe tap karo
Pehli screen poochti hai “What will this phone do?”. Run the counter pe tap karo. Bill isi phone se banenge, aur is phone ki apni GST invoice series hogi. Take orders at the tables waiter ke phone ke liye hai, aur Take orders and print them us captain ke liye jo apna chhota printer saath rakhta hai; dono mein se koi bhi dukaan nahi chalata. Galat card daba diya? Device tab pe “Start over — reset this phone” se yeh screen wapas aa jaati hai.
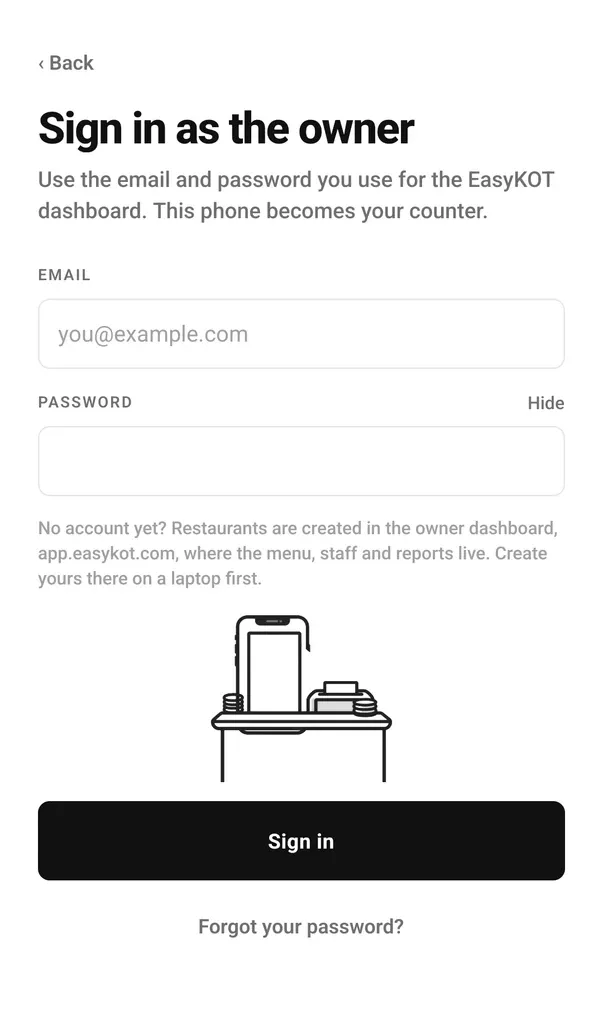
Owner ki tarah sign in karo
Jo email aur password app.easykot.com pe use kiya, wahi daalo aur Sign in dabao. Is waqt ek baar internet chahiye. Phir phone Setting up this phone dikhata hai: phone connect hota hai, menu download hota hai aur counter khulta hai. Yeh ek hi baar hota hai, uske baad phone seedha counter pe khulta hai, internet ho ya na ho.
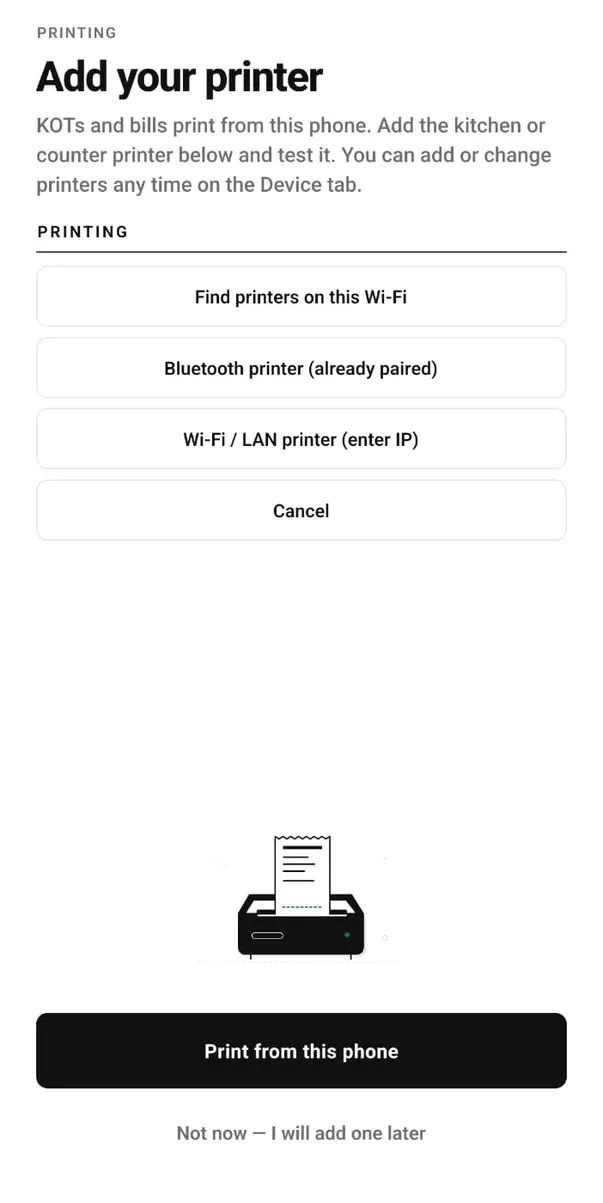
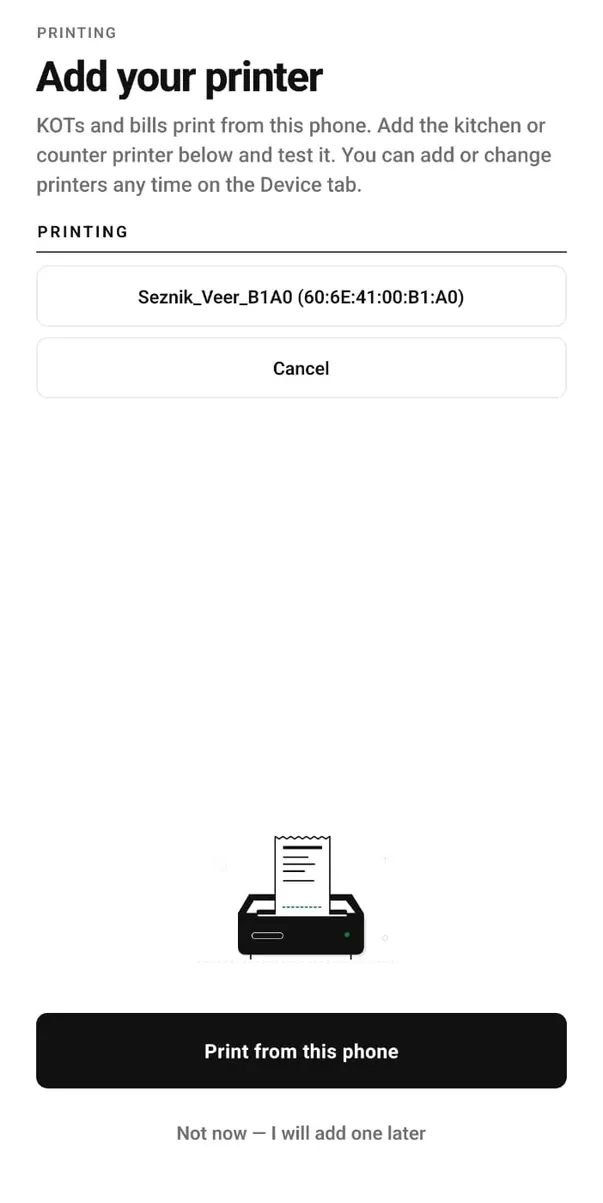
Printer add karo aur test slip nikalo
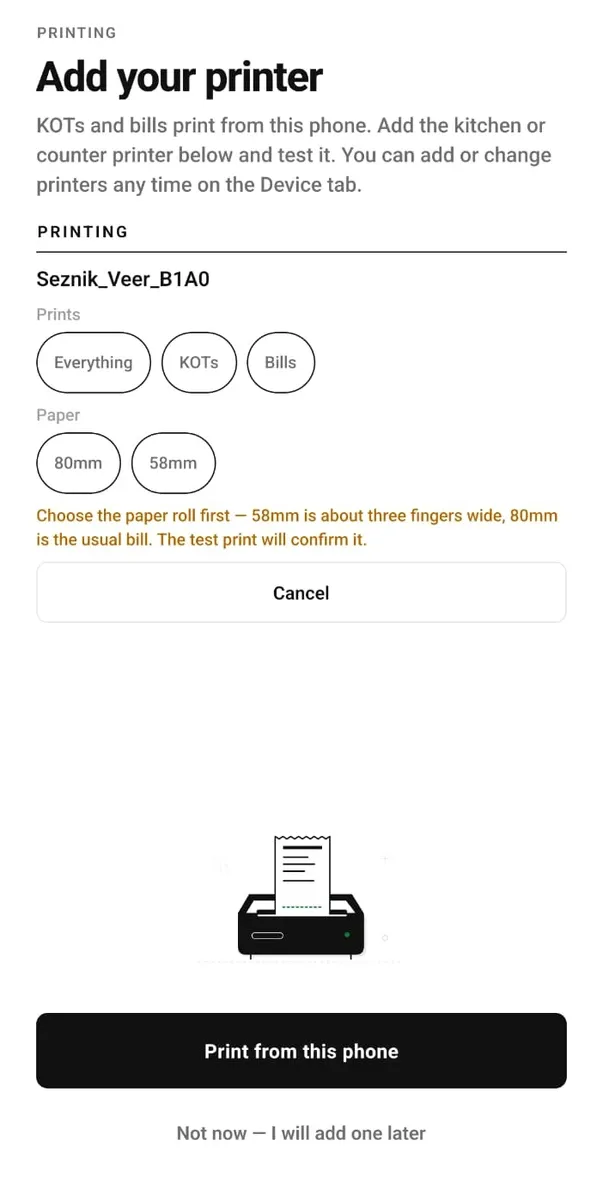
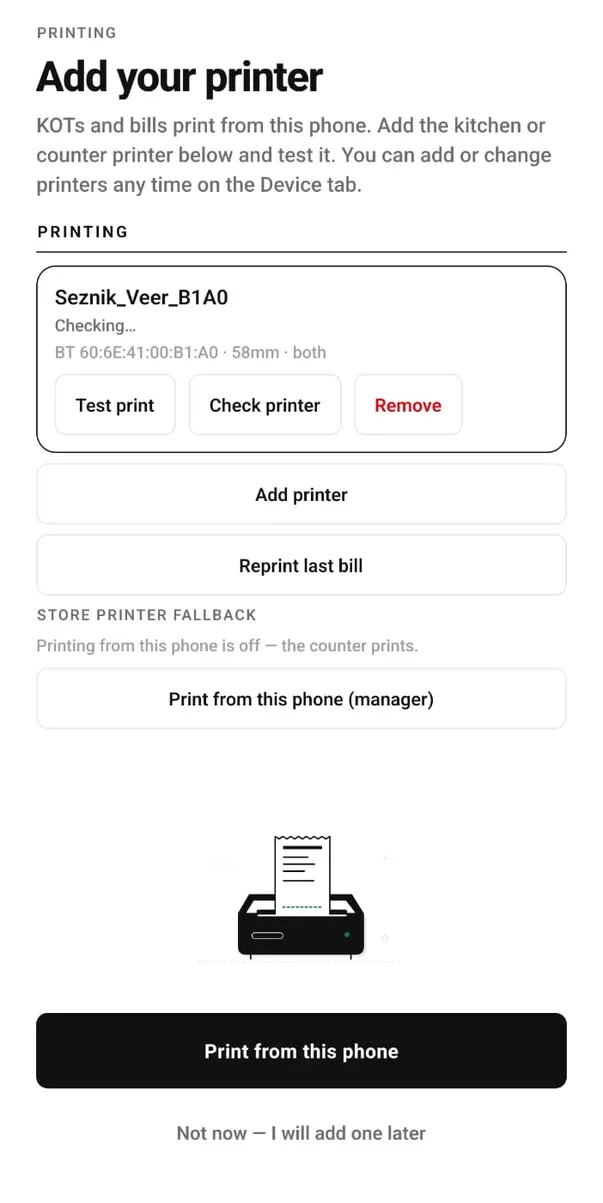
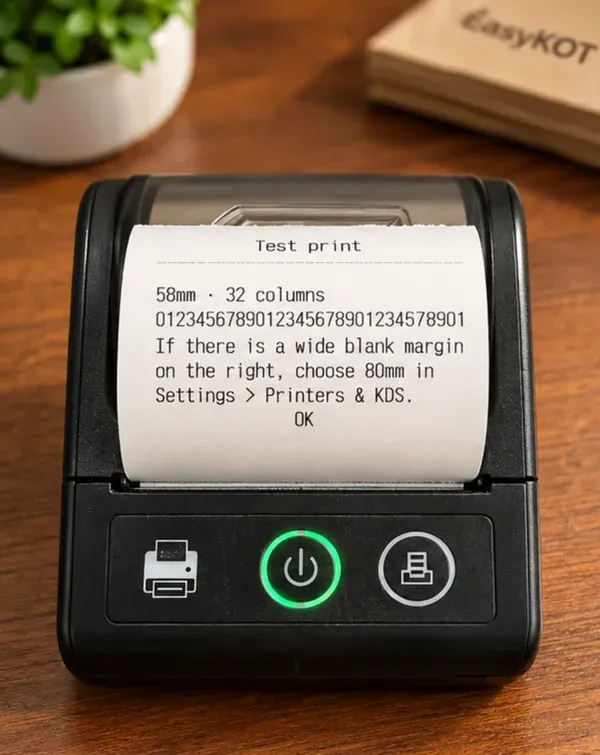
Ab “Add your printer” aata hai. Add printer dabao aur chuno printer kaise judega: pehle se paired Bluetooth printer, IP address wala Wi-Fi ya LAN printer, ya Wi-Fi pe search. Bluetooth printer pehle ek baar Android ki apni Bluetooth settings mein pair karo; use dekhne ke liye EasyKOT Nearby devices permission maangta hai. Wi-Fi printer mein uska IP address aur port 9100 daalo. Prints mein Everything chuno, Paper mein apne roll ki width, 58mm ya 80mm, aur printer save karo. Phir “Test print” chalao: phone batata hai slip bhej di, aur printer se test slip nikalti hai, jisme 58mm paper pe 32 digits ki line hoti hai. Line kat rahi hai toh width badlo aur dobara test karo. Uske baad “Print from this phone” dabao.
Bluetooth ke saare steps, har screen ke saath: Android phone se Bluetooth printer pair karo.
Cash box kholo
Device tab kholo. Cash box mein din shuru karne ke liye jitna cash box mein rakh rahe ho, rupees mein daalo aur Start cash shift dabao. Owner se yahan PIN nahi maanga jaata; captain box khole toh manager ka PIN lagta hai.
Pehla order lo aur KOT bhejo
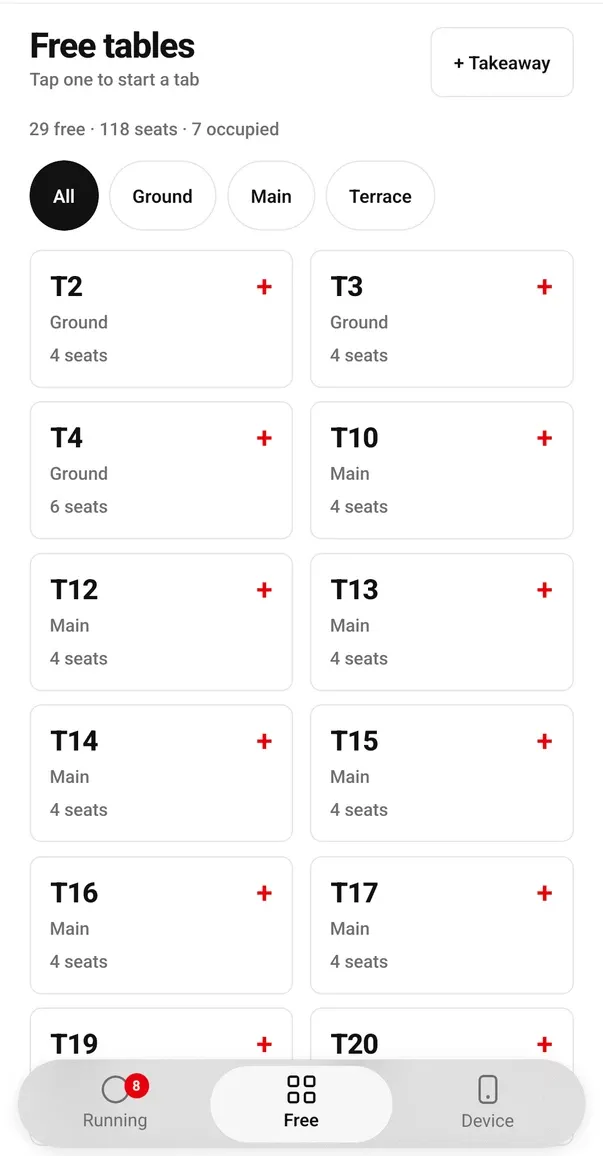
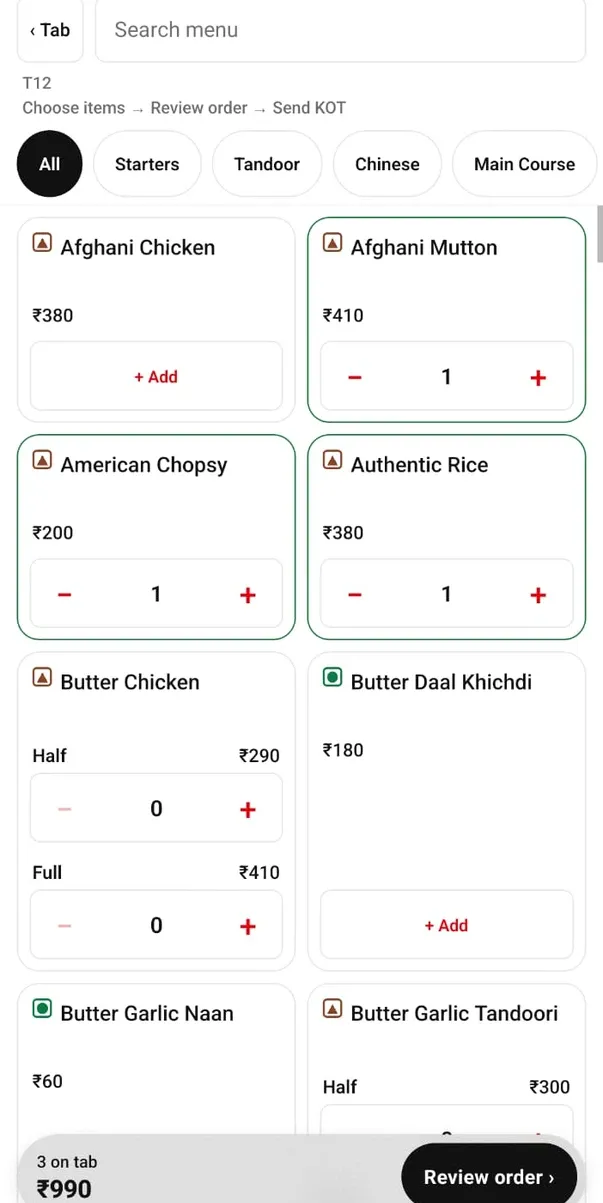
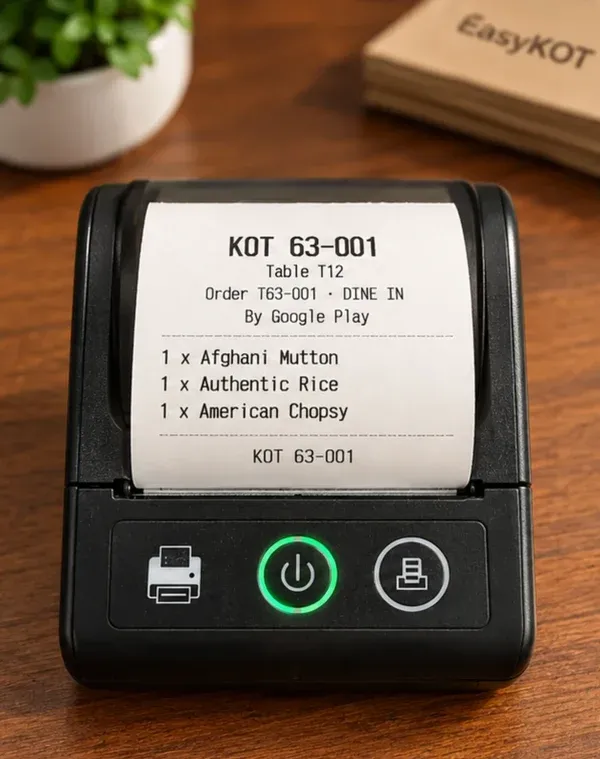
Free tab pe jao. Parcel order ke liye “+ Takeaway” pe tap karo; sirf phone wale store mein yahan tables nahi hote, tab yahi batata hai, toh har order yahin se shuru hota hai. Desktop App ne tables bana diye hain toh table pe tap karo. Dish pe + Add dabao, ya portion wali dish mein Half ya Full ke saamne +, phir Review order dabao, kitchen ke liye kuch bolna hai toh Note daalo, aur “Send KOT” dabao. KOT isi phone ke printer se turant nikalta hai, upar KOT number aur order number ke saath. Neeche ki pictures ek hi asli order ki hain, hamare test store mein table T12 ka T63-001; takeaway KOT pe table ki jagah TAKEAWAY aata hai.
Bill print karo, phir cash ya UPI mark karo
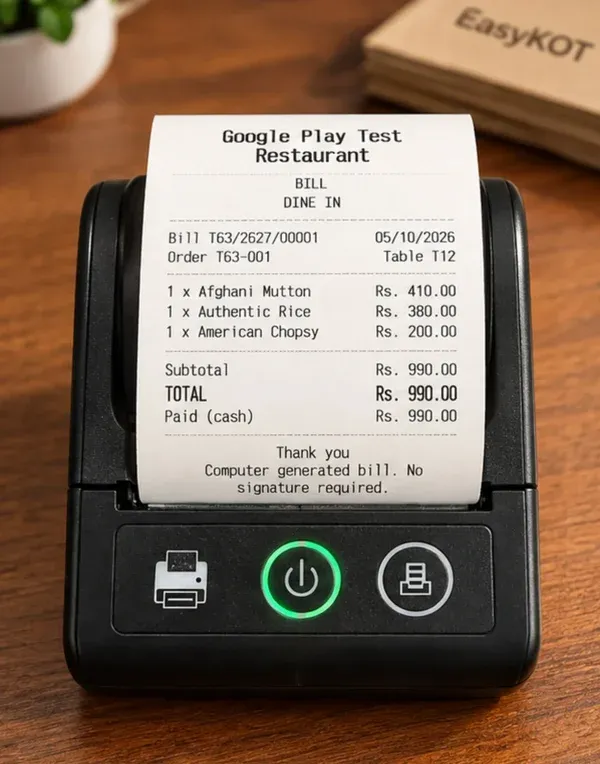
Order pe Settle dabao. Sheet mein subtotal, discount ka box aur total dikhta hai. “Print bill” dabao: phone batata hai kaunsa bill number print hua, aur bill pe invoice number, date, order number aur har dish aati hai. Phir Cash ya UPI dabao. Isse sirf record hota hai ki guest ne kaise pay kiya: na drawer khulta hai, na card read hota hai. UPI mark karne se pehle apne UPI app mein payment check kar lo. Neeche ka bill upar wale KOT ka hi order T63-001 hai.
Box gino aur shift close karo
Event khatam hone pe Device tab phir kholo. Cash box mein float, cash sales, UPI sales, cash in, paid out aur “Should be in the box” dikhta hai. “Count & close shift” dabao, box mein asli kitna cash hai woh daalo, aur phone expected amount, counted amount aur variance dikha deta hai.
Tables chahiye? Ek baar Desktop App pe banao.
- Phone pe table banane ka option nahi hai, aur dashboard pe bhi nahi. Tables sirf Windows ya Mac computer pe EasyKOT Desktop App mein Settings → Tables & floors se bante hain. Isliye sirf phone wale store ka Free tab khali dikhta hai aur + Takeaway deta hai.
- Event, stall ya parcel counter ke liye yahi sahi hai: har order takeaway, aur bill wahin ke wahin.
- Dine-in chahiye toh kisi bhi Windows ya Mac computer pe Desktop App ek baar install karo, tables banao, aur woh apne aap phone pe aa jaayenge. Steps: tables aur floor plan setup.
Rush ke beech phone chalta rahe, iske liye.
- Notification hatao mat. EasyKOT is the printer wali notification ka matlab hai printing chalu hai. Use swipe karke mat hatao. Device tab pe Open battery settings se EasyKOT ko battery optimisation se bahar rakho, warna screen band hone pe phone so sakta hai.
- Internet gaya toh bhi sale chalu. Order, KOT, bill aur cash box phone pe hi save hote hain. Internet aate hi dashboard pe sync ho jaate hain.
- Printer ka bhi dhyaan rakho. Printer full charge, aur ek extra paper roll saath. Paper khatam hua toh bhi sale nahi jaati: ticket phone pe wait karta hai aur Device tab se dobara print hota hai.
- Phone pe poore din ka flow aur uski limits: bina laptop ke POS chalao.
Seedhe jawaab.
Event pe internet chahiye?
Kaunsa printer lena chahiye?
Phone se tables add kar sakte hain?
Doosra phone order le sakta hai?
Phone pe card payment le sakte hain?
Bill pe mere GST details aayenge?
Setup ho gaya? Yeh bhi dekh lo.
Bluetooth printer pair karo
Android settings mein pairing, Nearby devices permission, paper width aur test slip, har screen ke saath.
Printer guide →Doosra phone jodo
Waiter ya helper ka phone Connect phone QR se jodo; uske KOT isi counter phone pe print honge.
Captain setup →Pehla GST bill
Invoice number, CGST/SGST lines aur reprint pe DUPLICATE stamp ka matlab.
GST bill guide →3 mahine try karein, phir plan chunein.
3 mahine free, poora product, card nahi chahiye. India mein bana, counter ke liye: ek chalte restaurant ke andar bana.