Build your menu by hand — dishes, prices and portions from the dashboard.
You do not need a menu file to start. Type a category, type a dish and its price, and it is on the till. Then give it the things a busy counter needs: a veg mark, the GST slab, Quarter, Half and Full prices, the paid extras. The same screens are how you change a price next month or mark a dish finished tonight.
Have a printed menu or a PDF? Let the AI import type it, then come back here for the finishing.
From the first category to a dish on the till — six steps.
Make your categories
Open Menu in the dashboard. In the Categories panel, type a name into New category and press Add. To put a category inside another (Veg Starters under Starters), press the + on the parent's row; one level deep is the limit. The switch on a row takes the whole category off every till and puts it back. The × deletes it straight away, with no confirm: its dishes are not deleted, they move to Uncategorised and keep selling. To change the order the till shows them in, press Reorder at the top of the panel, move rows with the arrows (a sub-category moves among its own siblings), and press Done.
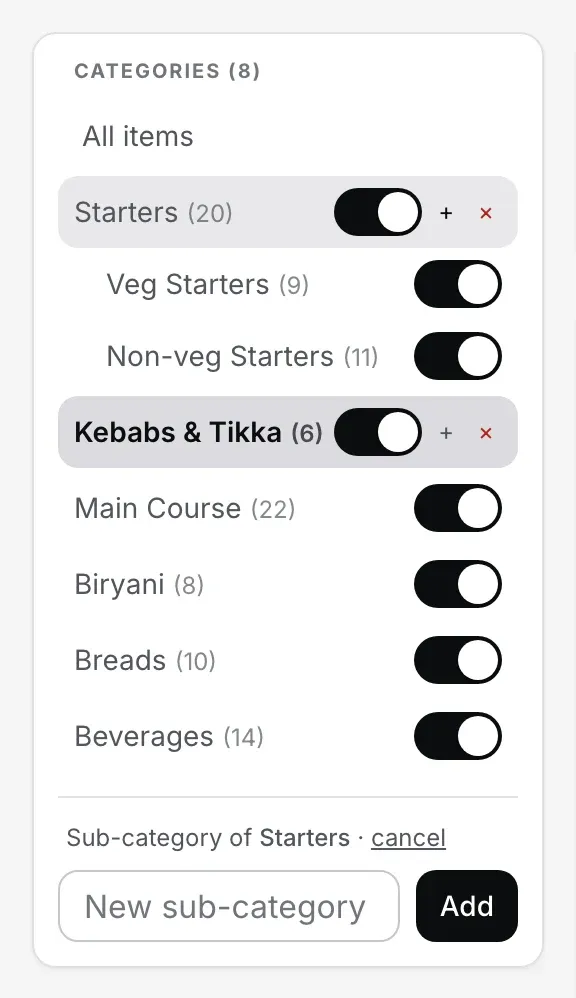
Step 1. Categories, sub-categories one level deep, and a switch per category.
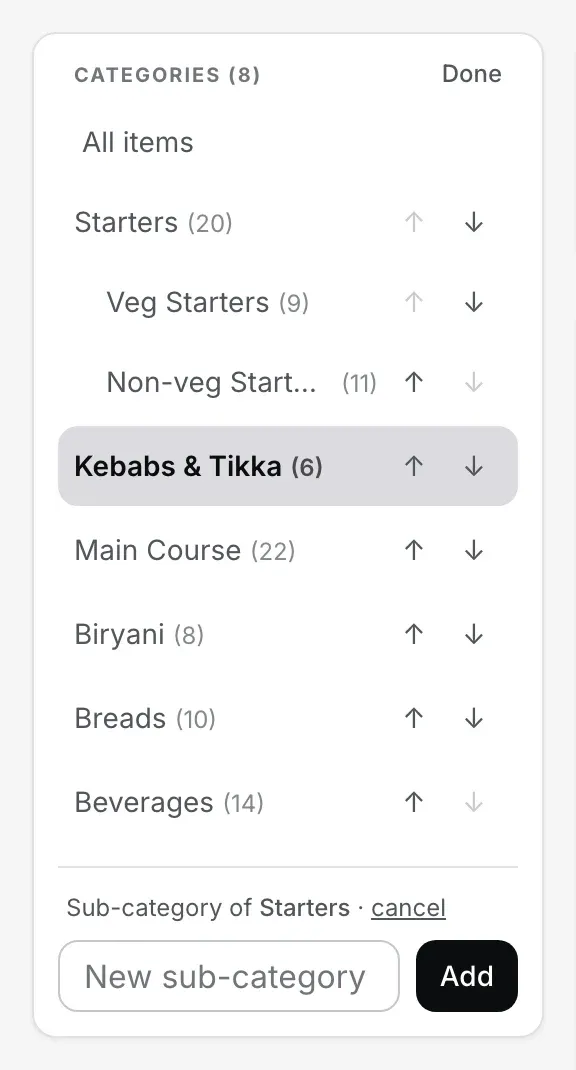
Reorder: arrows instead of switches, so nothing is hidden or deleted by a stray tap.
Quick add a dish
Pick the category in the left panel, then use the Quick add item card: a Name, a Price (₹), and Add item. The dish is on the menu at once, on your store's GST rate, and the till picks it up within moments.

Step 2. A name and a price is a dish.
Finish it in Edit
Press Edit on the dish. Set Veg, Non-veg or Egg, move it to another category, change the price (it is the price before tax), note what it costs you to make, and write a line for the description. If your store charges GST the slab picker sits beside the price, with the final price including tax worked out under it. Nothing here is saved until you press Save; Cancel throws the changes away.
Sell it in portions: Quarter, Half, Full, or any size
In the same editor, under Portions, press + Sell in portions. Half and Full appear at the dish's price. Type each price. Need a Quarter, a Family pack or a 1 kg? Type it into the box and press + Add size; there is no limit on how many. Switch off any size this dish is not sold in, then press Save portions. The arrows on a size move it up or down; that order is shared, so Quarter moved above Half moves on every dish at once. The sizes are one list for the whole menu, but a new size appears only on the dishes you price it on.
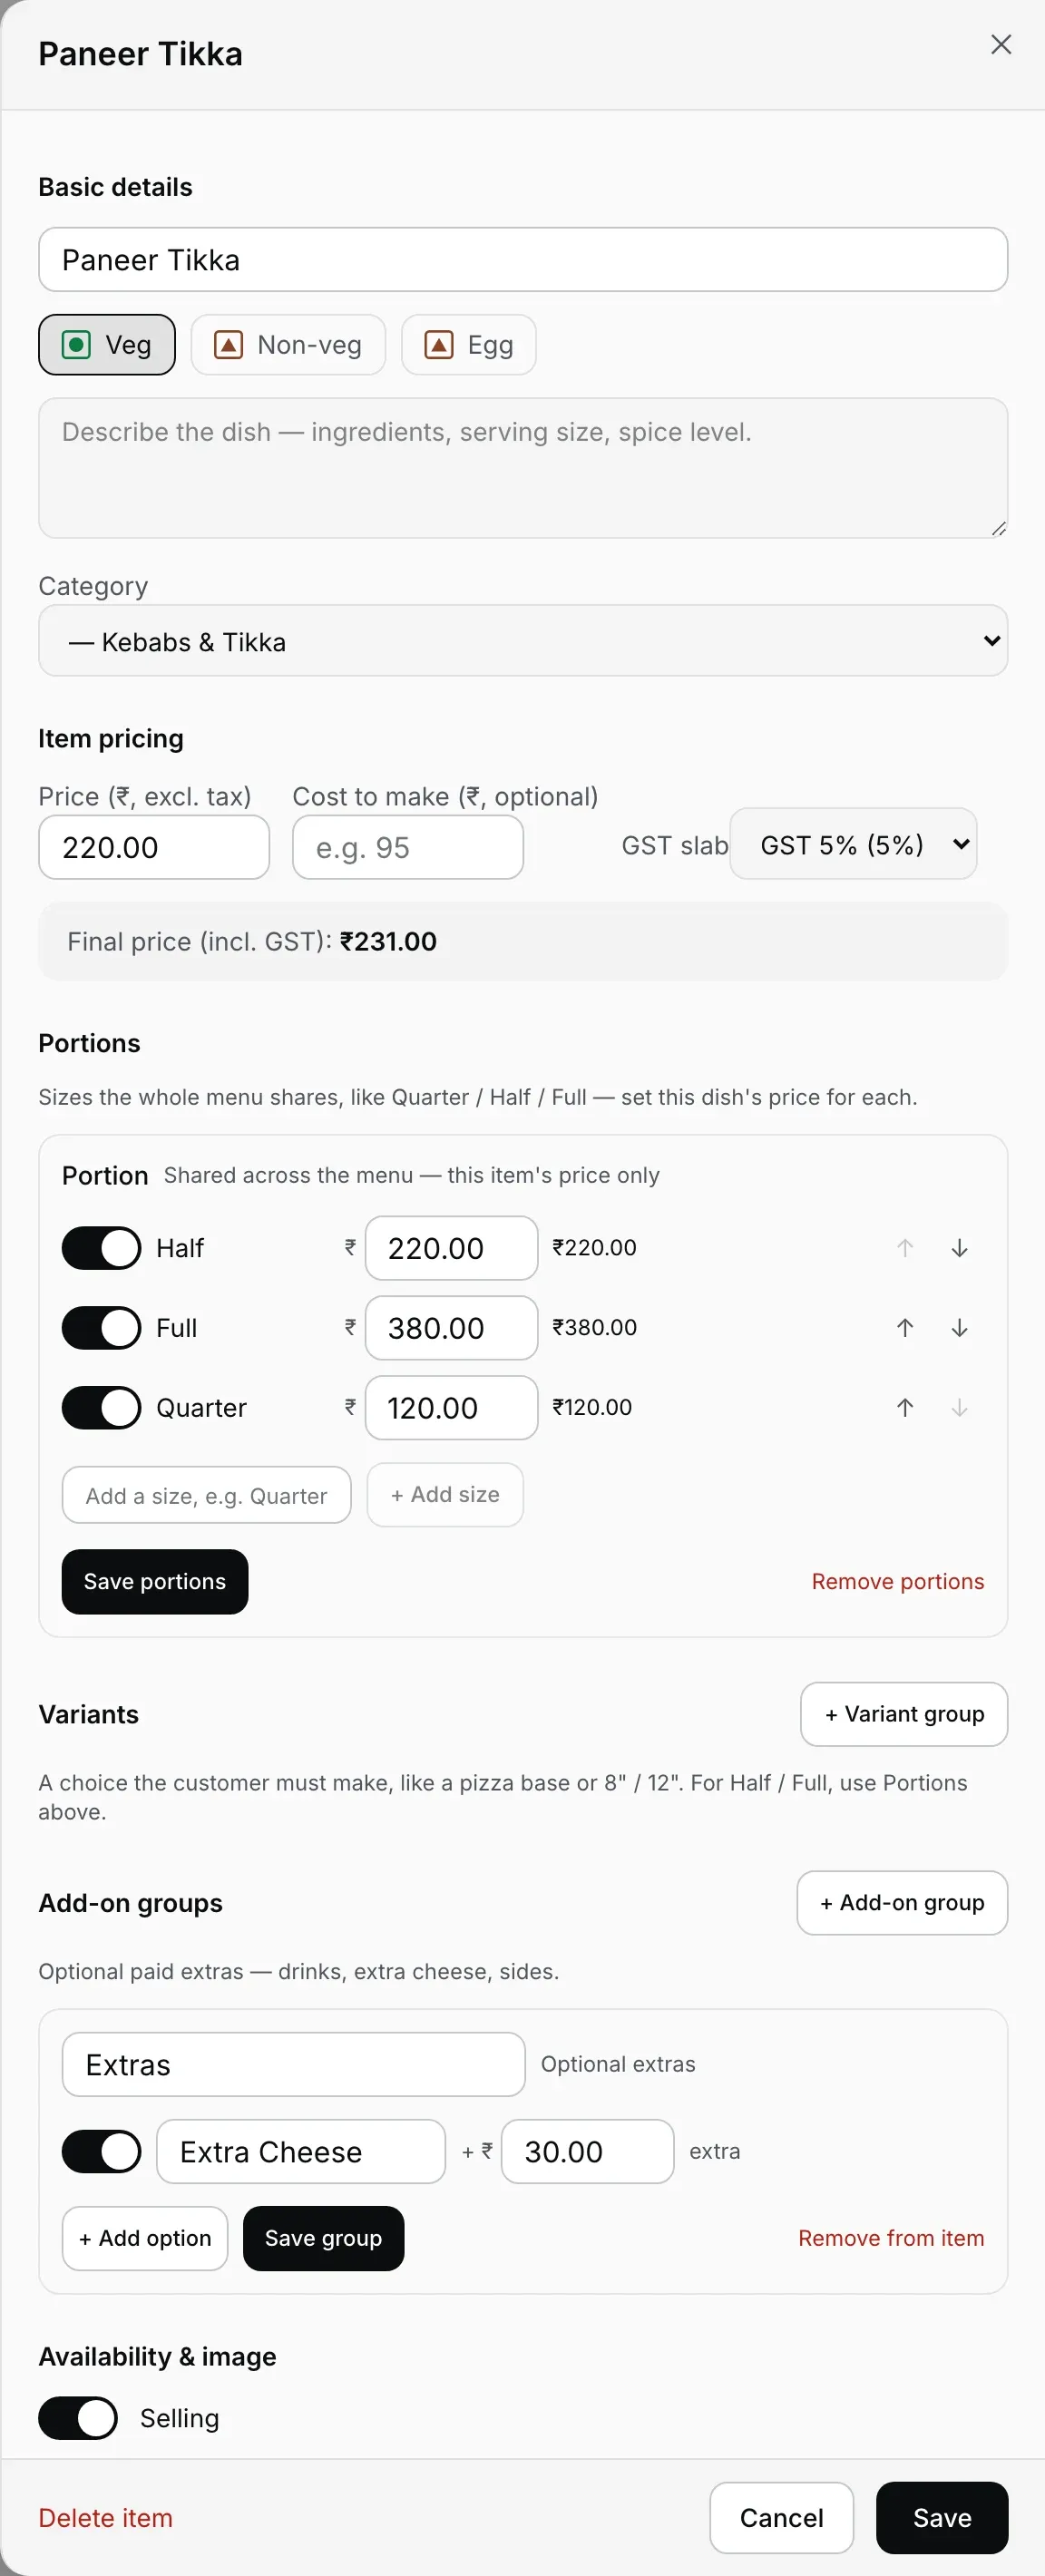
Steps 3 to 5 happen on this one screen: details, portions, extras.
Add extras and choices
Press + Add-on group for paid extras the guest may add (Extra Cheese at ₹30, a Coke, a side), or + Variant group for a choice the guest must make (a pizza base, an 8" or 12" crust). Name the group, add its options with their price, and press Save group. Half and Full do not go here; they belong in Portions.
Change a price, stock out, pin
Day to day you rarely need the editor. On the dish list, a dish without portions has its price right on the row: change it and click away, and it is saved. The switch on the row stocks a dish out (greyed on every till, not hidden) and back in; the pin puts it on the register's pinned shelf. The till picks it all up on its own, or press the refresh icon beside Online on the register to pull it now. During service the register's own Settings → Menu stock & pins does the same without the dashboard, even offline.
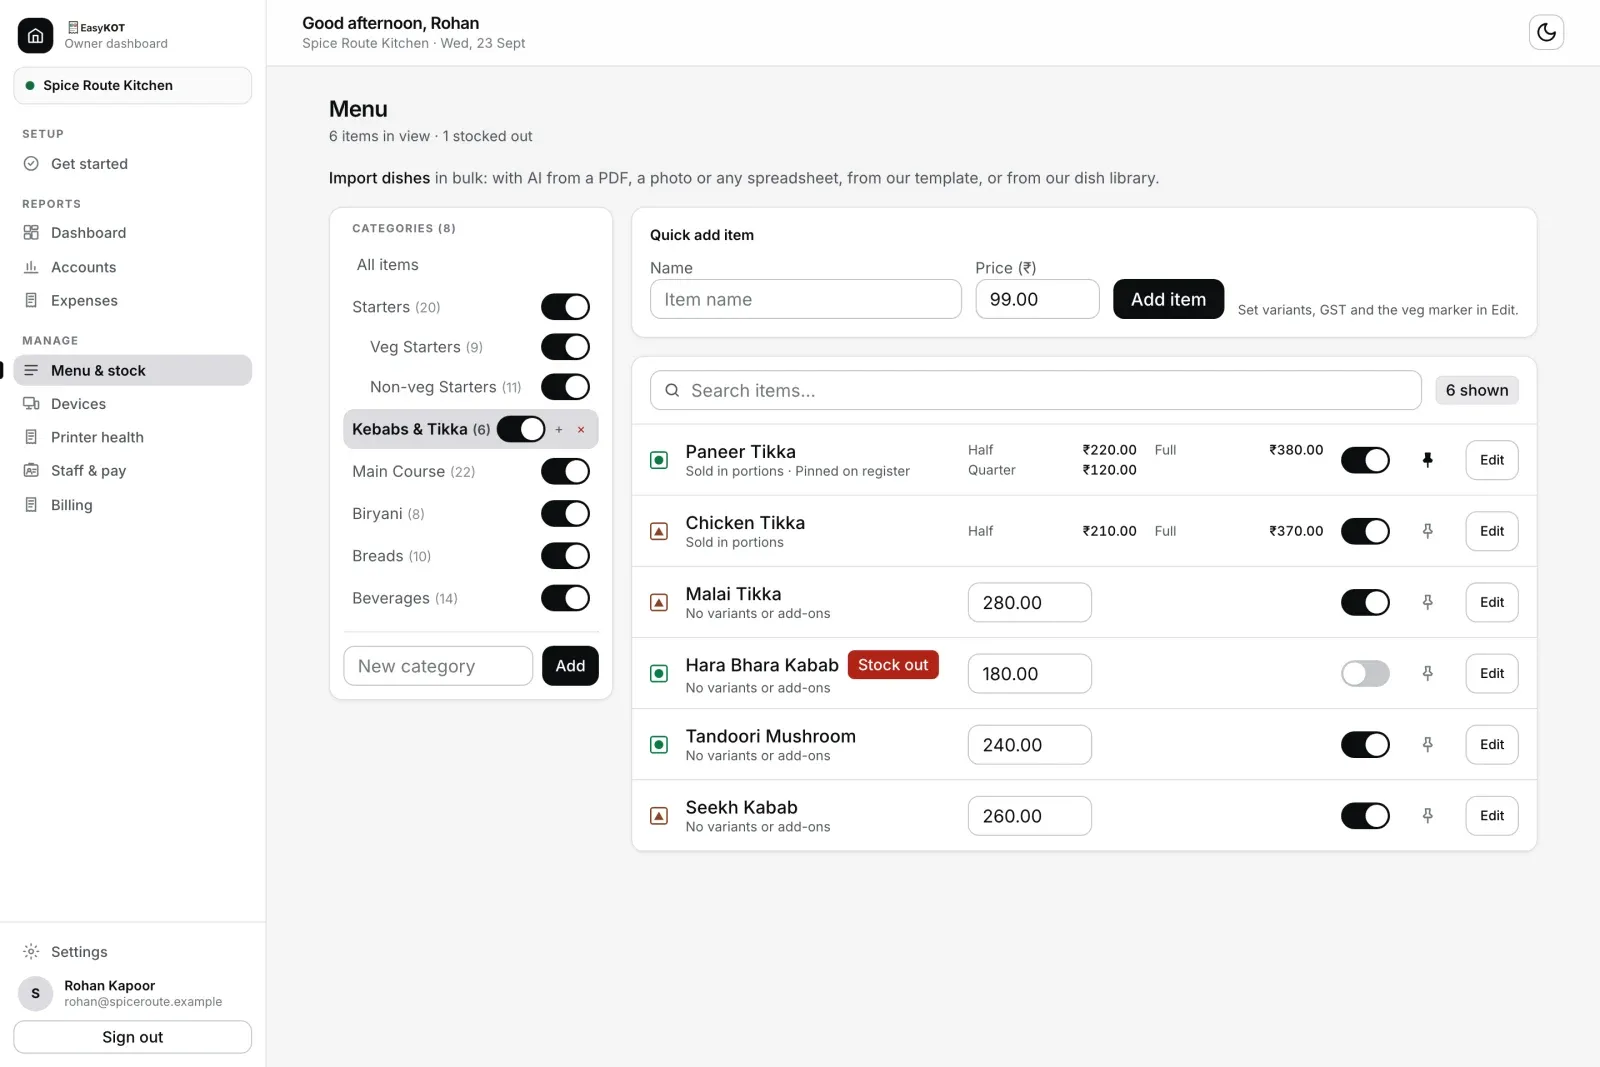
Step 6. Prices, stock switches and pins, right on the list.
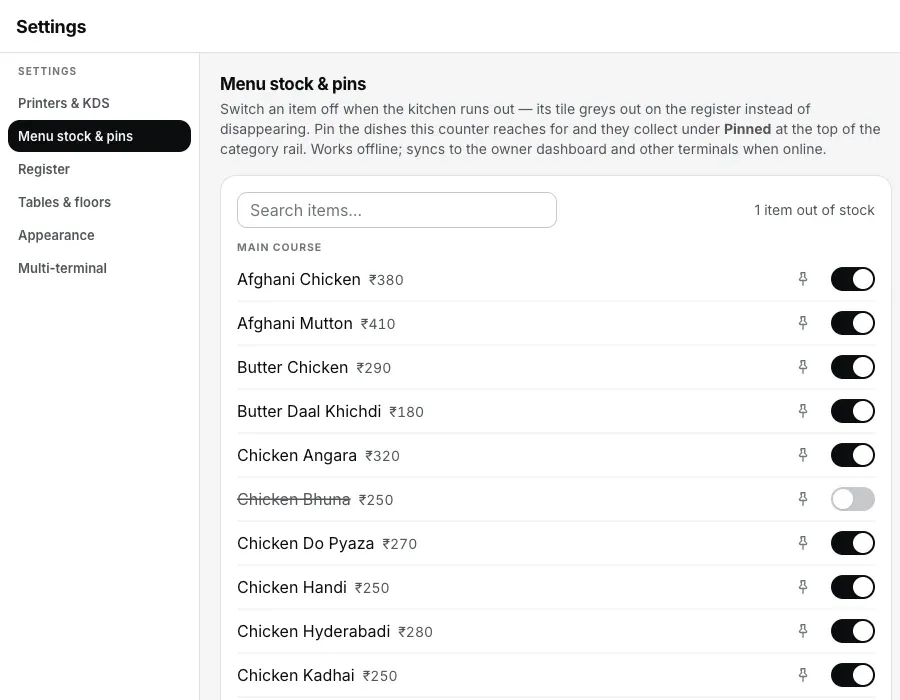
Or from the till itself, offline included.
What it doesn't do yet.
- Rename a category, or move a dish up or down.Categories reorder with Reorder; dishes cannot be moved yet. To rename a category, make the new one, move the dishes in Edit, and delete the old.
- Rename or remove a portion size. A size you no longer want can be switched off on each dish.
- Upload a dish photo. The editor takes a link to an image you have already put online, not a file from your phone.
- Change many prices at once. Prices change dish by dish. For a whole-menu price rise, the quicker road is a sheet in our template on Use our template: dishes are matched by name and category, so the import updates them instead of adding copies.
Straight answers.
I have no menu file. Can I still set up?
How many portion sizes can a dish have?
Half and Full: Portions or a variant group?
I changed a price. When does the till charge it?
What happens to old bills if I delete a dish?
With the menu in.
Your first GST bill
Punch a portioned dish, fire the KOT, and print the tax invoice.
Make the first bill →Menu setup & AI import
A long menu from photos or a PDF, checked in a grid before anything saves.
Import the menu →Menu management, in full
The feature tour of the dashboard side, stock-outs and pins included.
See menu management →Every guide in this cluster is listed on the guides hub.
Run it 3 months, then pay for it.
Three months free, full product, no card. Made in India, for the counter: built inside a running restaurant.